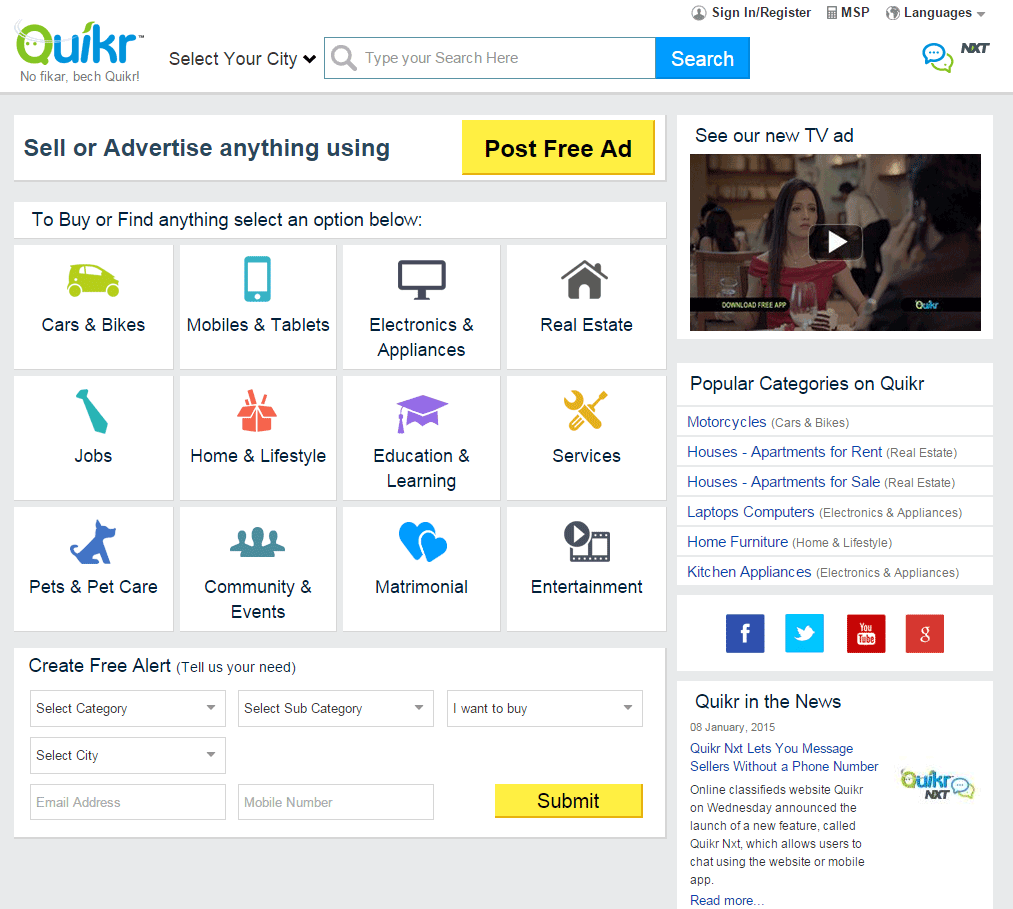
Many of our customers asked for adding icons to main categories for making more appealing for site visitors. As an example you can see home page of quikr.com, India’s most popular classifieds website. They have main categories with icons on home page.
Before using this tutorial make sure that you have added all your locations and categories. Also get familiar with managing (add, edit, delete) them.

As many of you know there is no built in way adding icons to categories. But we can use custom PHP code in “Text” widget to list main categories and display image for each category. Here we will explain how to do it. It is a bit complicated solution so be prepared.
Prepare your icons for each main category. In our example we will use icons similar to quikr.com website for following categories: Transport, Property, Jobs, Services and Stuff for sale. They are also main categories on our demo site. Each image should have same size. Name them similar to your category names so you do not get confused later.
![]()
After creating your images upload them with FTP to /public/images/cat-icons/ folder. You can use any location in /public/images/ folder, we used “cat-icons” in our example.
Then open web browser and go to your website and login as administrator.
Learn id for each main category. Follow this steps to learn category ids.
![]()
- Navigate to “Manage” → “Categories” page on admin panel.
- Move mouse over category name link and note id which is last number in displayed URL. In our example displayed URL has
/admin/categories/1/and id is “1”. Note this on paper and learn ids for all main categories. In our example they are:- 1: Transport
- 2: Property
- 4: Jobs
- 50: services
- 55: Stuff for sale
Write PHP code to associate category ids with category icons that we created earlier. Then get main categories and display them, also add some CSS styling. Here is code that we created for our tutorial.
<?php
// create category id and icon name map. This may be different for your website because you will have different categories, ids and images.
$cat_icon_map = array(
 '1' => 'car.png',
 '2' => 'prop.png',
 '4' => 'job.png',
 '50' => 'service.png',
 '55' => 'goods.png',
 );

// get current active location
$selected_location = self::$_vars['selected_location'];

// get all categories
$categories = Category::getAllCategoryNamesTree(Category::STATUS_ENABLED);
$return = '';
foreach($categories[0] as $cat)
{
 $img = '<img src="'.URL_ASSETS.'images/cat-icons/'.$cat_icon_map[$cat->id].'" />';
 $return .= '<a href="'.Location::url($selected_location, $cat).'">'.$img.'<span>'.View::escape(Category::getName($cat)).'</span></a>';
}

echo '<div class="cat-icons">'.$return.'</div>';
?>
<style>
.cat-icons{text-align:center;}
.cat-icons a{display:inline-block;width:150px; height:70px; text-align:center; background:#fff;text-decoration:none; padding:10px 0; margin:1px;min-width:19%;}
.cat-icons a:hover{text-decoration:underline;}
.cat-icons a img{}
.cat-icons a span{display:block; font-size:130%;}
</style>
Paste it to your text widget and select text format as PHP as shown in image. Read more about adding text widget in this tutorial. Remember placing widget to “Pages” – “Home Page” not to “Sidebar”. Switch from sidebar to pages is located on right top position in “Appearance” → “Widgets” page.
![]()
You can download tutorial files with php code here.
PS: We have 5 main categories that's why we set min-width:19%; in our css. If you want 4 items per line like on quikr then set it to 24%. 1% is reserved for margins.
What is next:
- Add text/HTML/PHP widget.
- Add custom JavaScript.
- Add custom CSS.
- View sub categories on category page.
- Use custom fields as navigation inside categories widget like in Avito.
- Manage locations and categories.